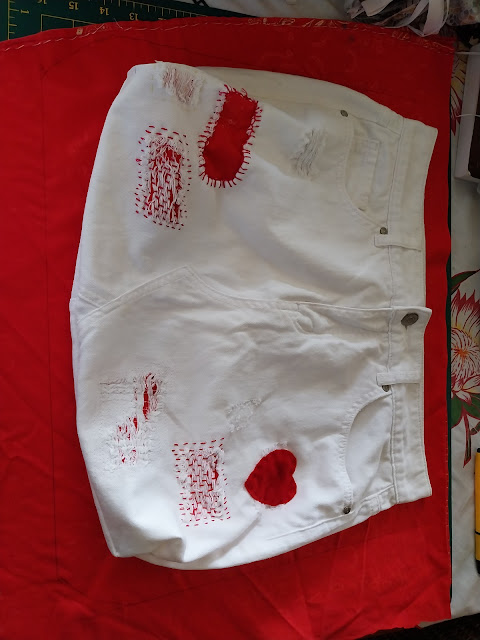
I purchased another class from Craft school of oz! I was inspired after doing a couple of free classes learning Shashiko stitching and decided to venture more into this meditative method of stitching. I have been re-purposing unsold garments to sell in the op shop instead of sending them to landfill. This made a white ripped pair of shorts into a more interesting piece before I turned it into a bag.
Africanaussie crafts
I love to sew and knit and crochet, and get ideas from others about what they are doing. Hopefully others will get pleasure from what I have been doing.
Saturday, January 14, 2023
Slow stitching and Creative Mending
Friday, January 6, 2023
Re-fashioning Jeans
In our hot and humid climate, jeans are not big movers in our op shop. We had a $1 a pair sale, and still have full racks..... so I decided to make up a few different bags to see if we can value add items saved from landfill.
Re-fashioning those items into something useful.
another bag finished!
Monday, January 10, 2022
Coiled baskets - a gift to myself!
I have been interested in making baskets for along time, and last year I purchased an online class on making baskets from the garden. I found it really messy and required a lot of space to collect all the bits and pieces so really did not pursue it after the initial spurt of creativity. The same school offered a course on coiled baskets which I had been greatly admiring, so I bought that course as a Christmas present to myself! It is run by the same lady as the baskets from the garden - Ruth, who I found very easy to follow. It is super easy to go back and check the instructions.
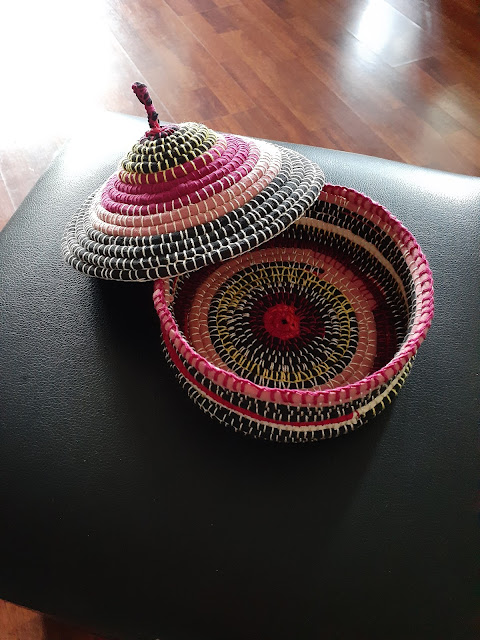
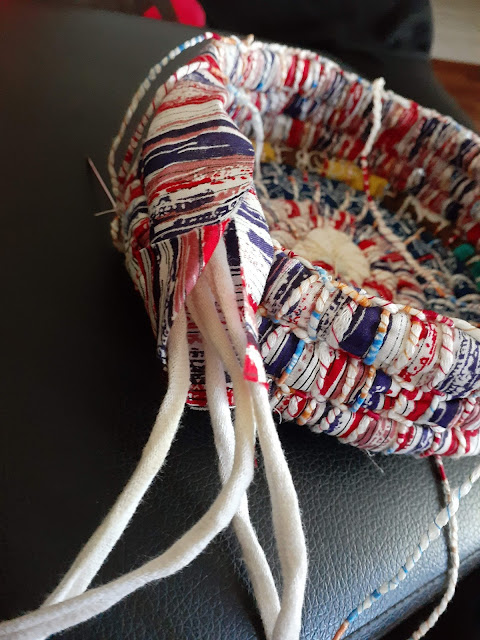
Oh my! am I hooked! This was the first basket I created. I made a little lid in what I considered an African design - like a rondavel, which is a "round house" This was t shirt material wrapped around string and sewn with crochet cotton.
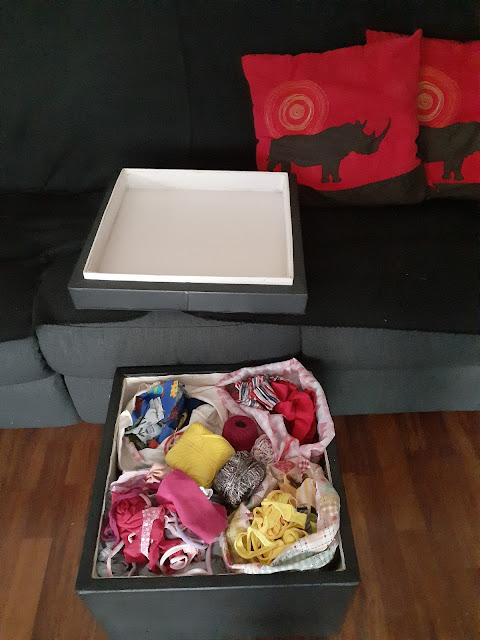
From then on, there was no stopping me. as you know I am very keen to recycle materials instead of sending them to landfill and this is a perfect way of doing that. At one stage I made necklaces out of t shirt material, and I still use that for tying up plants etc. I have quite a collection of cut up t shirts and I keep them in a little footstool right next to the couch. Perfect for picking my project up and working on it, and then packing away easily when I want to take a break. I organized the fabric into colour themes, since my daughter is always telling me to use a colour wheel.
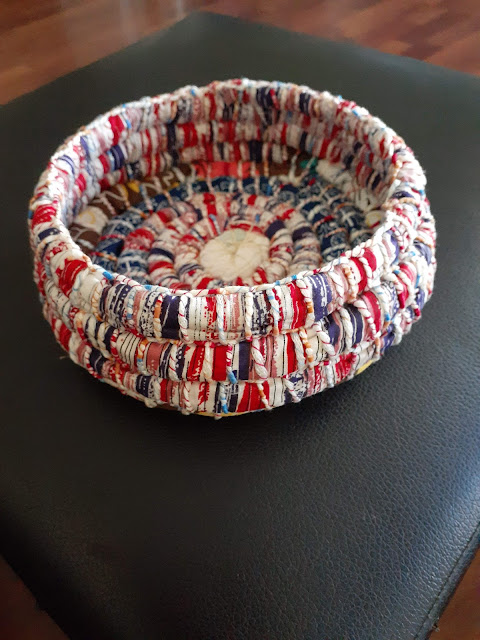
The first one used rope as the center core, and I decided I wanted to use recyclable materials so used four strands of t shirt material as the core for this one. I used some pretty wool for the stitching. All kinds of materials being used up!
Tuesday, June 1, 2021
Bringing the forest into the living room!
For a while I have been trying to bring more plants into the living room. We have three big sliding glass doors in the living room so you can see my lovely tropical garden from every angle. I hung a macrame hanger in front of window, and borught in more pot plants. Some of which didnt like the transfer from my garden to inside!
I mulled over it was that I wanted - actual plants? or did I want something different on the walls? Huge sunflower posters? Wallpaper? I just didnt know, all I knew was that I needed a change. We had just purchased new living room furniture. Dark grey, a safe colour with the silver grey curtains, and pale yellow walls. In the meantime, I began to wash down the walls, and curtains, and remove clutter.
It was very timely to recieve an offer from a wonderful company in Sweden called Photowall.
Check them out here: https://www.photowall.com
They offered to send me a product so that I could review it on my blog. Ohmigosh - the choices! I knew that I wanted a nature theme, but did I want wallpaper or a canvas print or a wall hanging?
There are lots of different articles and ideas - how to make little baskets for your office equipment from leftover wallpaper - or a garland of rosettes! Gosh I certainly came away with all sorts of wonderful ideas!
In the end I ordered a canvas print of a forest scene. Thinking I would put it behind the couch and it would seem like a window looking out to the forest. I ordered a long narrow print, thinking that I did not want it to be overwhelming. Considering it came all the way from Norway it arrived very quickly. Very well packaged in a long box. Immediately I could see the quality of the product.
I laid it out on the table out in the garden, and followed the instructions on how to put it together. Placing the wooden frames along each edge and then turning them inside to stretch and lock the frame in place.
There are hinges that fit in each corner and some very easy to use screws to screw it all into place. Everything lined up perfectly. I am so very impressed by the quality.So I flipped it over and took it inside and hung it up where I had orginially intended it to go. Bearing in mind that I had never measured the area, or put much thought into how it would fit I was not too surprised to see that it was not going to work where the hangers from my other pictures had been or even directly above the couch.
Thursday, May 20, 2021
Beeswax wraps
I have been making and using beeswax wraps for about a year now. Reducing plastic in our lives is so important. Plastic never goes away, and it is really worrying to think about that fact. Micro-beads of plastic are showing up in the fish we eat, and the only way we can stop this occurring is to STOP USING PLASTIC. One way is to use beeswax wraps instead of cling-wrap. Choose pretty 100% cotton fabric, and cut it into the sizes you desire. You can pink the edges, or sew with a three point zig zag as I do.


I buy my beeswax locally from a dear friend who sells honey, and I love the fact that it is a little bit rustic, and even sometimes has the odd little bits of unknown objects in it! I used to grate it but find it is easier to take a large knife and just shave pieces off it. If you get natural beeswax like this, then I would suggest you select fabric that does not have a lot of white background, as the wax tends to yellow it. You can buy beeswax pellets that are white from echo warehouse. https://ecowarehouse.com.au/products/beeswax100purerefinedpelletsper100g?utm_medium=cpc&utm_source=google&utm_campaign=Google%20Shopping&gclid=Cj0KCQjw2PP1BRCiARIsAEqv-pRYGNQC3Hp9Y5Dts21Xjm7v2qaPo8cshFI4IPhgkTqNMhCiq3aqAXkaAmO9EALw_wcB
The other product you are going to need is pine rosin, this is used to create the tackiness. You need twice as much beeswax by weight as pine rosin.
https://ecowarehouse.com.au/products/colophonypinerosinpineresinper100g?_pos=1&_sid=9dc273c15&_ss=r

These need to be placed into a double boiler, or a bowl on top of a pot containing water. The water should not touch the bottom of the bowl, but make sure you have enough water that the pot does not boil dry. Add jojoba oil or coconut oil, this keeps the wraps a little more pliable.
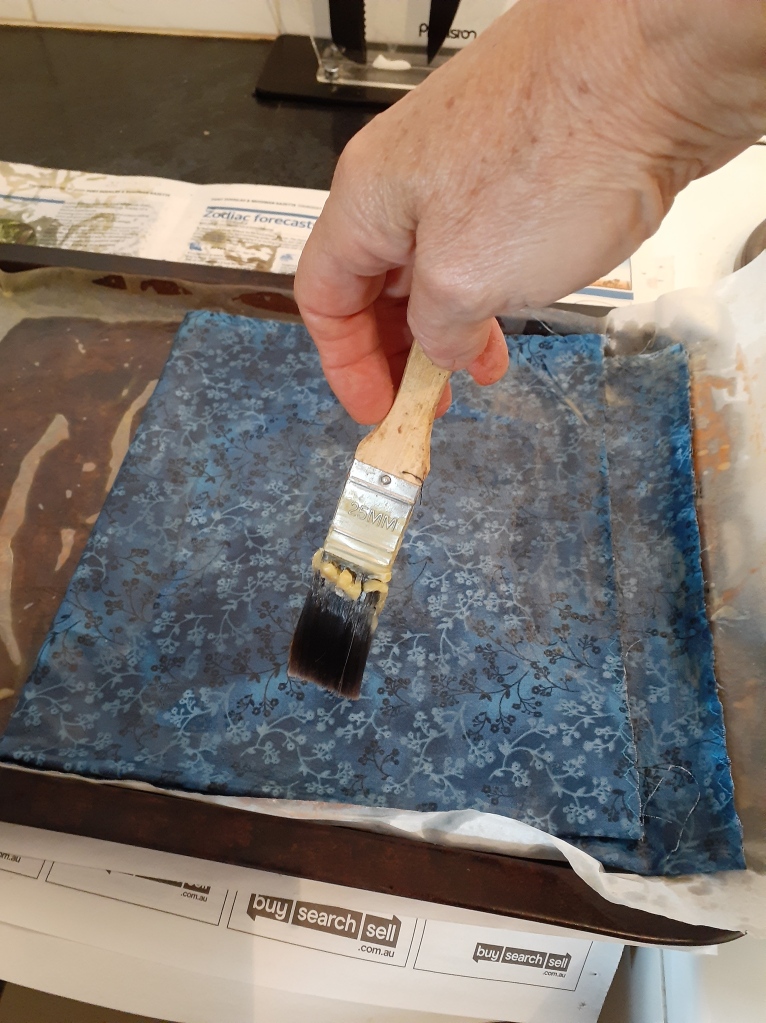
Once the mixture has completely dissolved ( the pine rosin takes much longer than the beeswax) you need to paint the mixture onto the prepared fabric. I put the fabric on a baking tray covered with wax wrap, for larger wraps the material can be doubled over. Then I pop the tray into the oven, set on low or 100*C for a few minutes. Take it out, and check that all the fabric is evenly coated. When well coated, lift the wrap up and gently wave it around until it starts to dry. the wrap can then be place on another sheet of wax wrap to harden and dry.
You have just completed your first beeswax wrap.
Thursday, September 7, 2017
Necklaces from recycled t-shirts.
This is what I am making, and will sell them here on my blog and once a month at the markets here in tropical north Queensland. They are so comfortable and light to wear, you can twist them, double them up, clip on brooches or fabric roses. I am really loving this new craft I have discovered!
Sensory necklaces for Mum and Bub. Something for baby to tug on, play with, grab.
Completely machine washable - each necklace comes with its own little gift/wash bag.
Buck the trend - Reduce, RE-use, recycle.
Necklaces are AU$15.00 each or two for AU$20.00, plus postage. Bracelets are AU$5.00 each and if you bring me two use-able t-shirts you get a free bracelet!
